Managing conversations
Learn how to organize, find, delete and share your conversations directly in the Munia platform.
Updated on 6 mars 2026
As you use Munia, conversations build up in the left sidebar, sorted from the most recent to the oldest. Several tools are available to help you find your way around quickly.
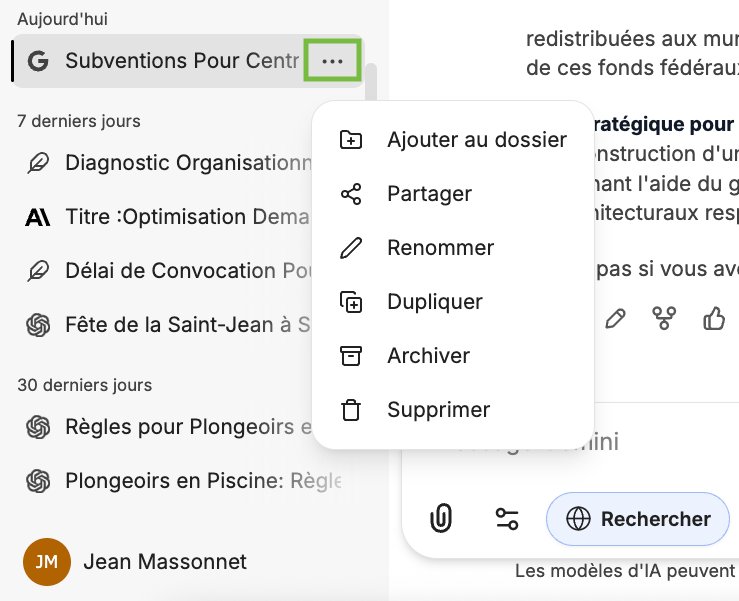
1. Rename a conversation
- In the left sidebar, find the conversation to rename.
- Click the three small dots to the right of its title.
- Select « Rename ».
- Enter the new name (e.g., « Grant ») and confirm.
2. Create a folder
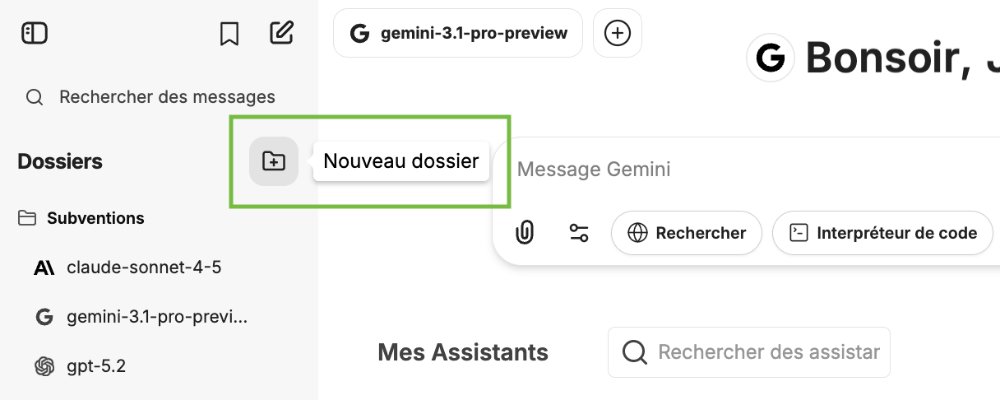
- Find the « Folders » section in the left sidebar.
- Click the create folder icon.
- Name the folder (e.g., « Grant ») and click « Save ».
3. Add a conversation to a folder
Two methods are available:
Method A, drag and drop: drag the conversation directly into the folder you want in the sidebar.
Method B, through the menu: click the three small dots on the conversation, select « Add to folder », then choose the target folder.
The conversation then appears in the folder. Click the folder to show or hide its contents.
4. Delete a conversation
- Click the three small dots on the conversation to delete.
- Select « Delete ».
5. Share a conversation
Two methods are available:
Method A, through the conversation menu: click the three small dots, then « Share », then click the green « Create a link » button. Copy the link generated (shortcut: Ctrl+V to paste it).
Method B, through the button at the top right: click the share icon located at the top right of the conversation (to the left of the blue button with the light bulb), then follow the same steps to create and copy the link.
Good to know when sharing:
- Your user name is hidden: sharing remains anonymous.
- Files attached to the conversation cannot be downloaded by the recipient.
- Future messages you send in your conversation will not be visible in the share link. You will have to delete it and create a new one for the new messages to be visible.
Going further 🚀
🎥 Next tutorial ➡️ 10 – Creating an assistant